Whenever you are going to connect your Android phone with your computer to edit the contents in your phone, you have to enable USB debugging on your Android phones so that the computer can recognize and detect your phone. The way to enable USB debugging differs a little with different Android versions. And now let’s check out how to enable USB debugging for different versions on Android phones accordingly.
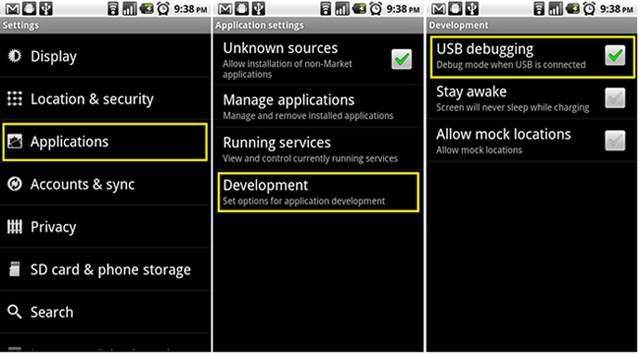
For Android phone with Android 2.3 or earlier version, you can enable USB debugging easily like the followings:
1. Enter Settings App.
2. Click Applications item.
3. Click Development item.
4. Check USB debugging.
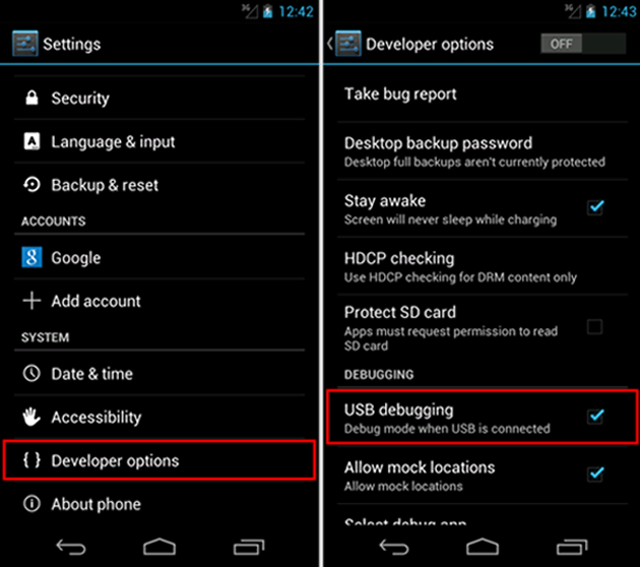
For Android phone with Android 3.0 to Android 4.1 version, you can enable USB debugging easily like the followings:
1. Enter Settings App.
2. Click Developer options item.
3. Check USB debugging.
Google has changed how you can enable USB debugging on Android 4.2 compared with earlier versions like the followings:
1. Enter Settings.
2. Click About Phone item.
3. Tap Build number repeated for seven times, and then you will be prompted “You are under developer mode”.
4. Go back to Settings page and click Developer options.
5. Check USB debugging.
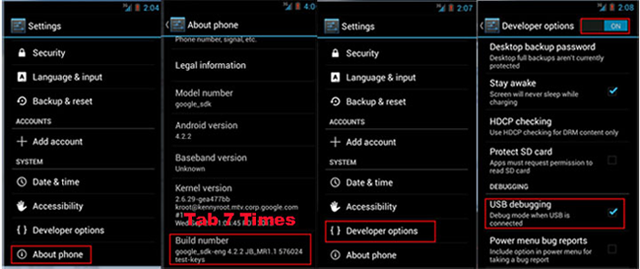
6. Immediately it pops up an Allow USB debugging dialog. Check Always allow from this computer and click on OK.
Check which version your Android phone belongs to first and then follow this tutorial to enalbe the USB debugging on your Android phone accordingly.