An ISO image file is usually used to install software, applications or operating system. There are many times when we need to scan an ISO file’s contents before burning it onto a USB/CD/DVD. In Windows 7 and the earlier versions of Windows, users need to use a third-party tool or software to mount an ISO image file to access its contents. Well, in Windows 8 you don’t need any 3rd part applications any more. Windows 8 itself allows you to do this task by only one click. Now let’s look at how to mount an ISO file in Windows 8.
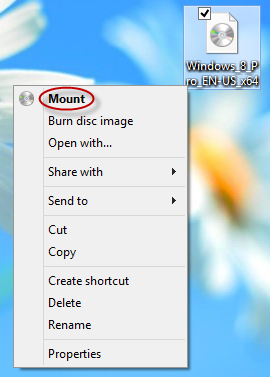
1. Find your ISO image file and right click on it. From the popped up menu list, click on the Mount. (You also can double click on the ISO image file to mount it)
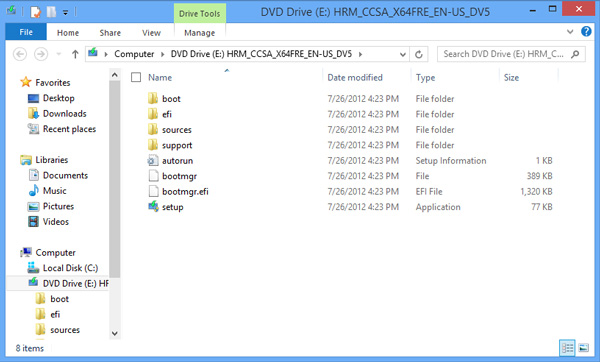
2. Immediately it automatically opens the ISO image file. And you can view all contents in it.
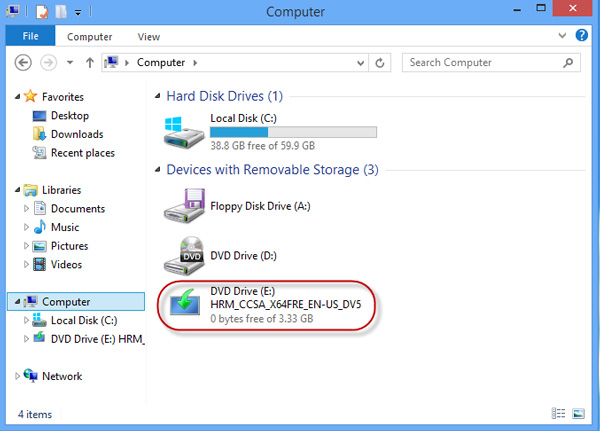
3. Check all hard disk drives and removable storage devices on your computer. You will find a new virtual drive under the "Devices with removable Storage".
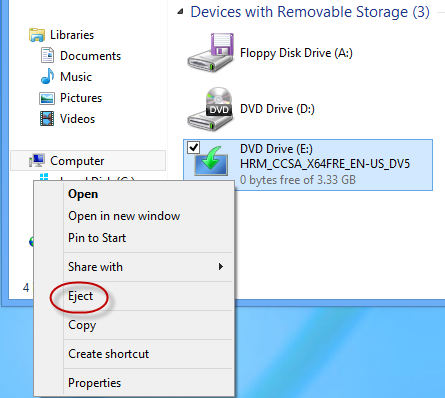
If you don’t need this ISO image file any more you can unmount it. Just right click on the virtual drive icon and click on Eject. Then it will immediately disappear.
Note: In Windows 7 or the earlier versions of Windows you need to install a third party application to access the contents of an ISO image file. If not, you will never directly open an ISO image file. When right click on the ISO file you should click on "Open with" to select the software to open the ISO file. Also you can double click on the ISO file and it should be opened defaultly by that sofware. For example, here I use the software "UItraISO" to mount an ISO file in Windows 7.